Home remodeling projects can be a huge hassle. They tie up a room and keep you from using a bathroom, kitchen, or living room until they’re finished. And while a coat of interior paint may only tie up a room for a day, bigger ticket projects can take a while. Painting the exterior of your home can take less time (and less cash) than any other remodeling project.
Plus, painting your home protects it! The new coat of paint helps shield your home from the elements. And when it starts to crack or peel, then it’s time to invest in a few new coats.
But before you start painting your home, you’ll need to do a little bit of work to fix any problem areas so that the area will be properly protected and look its best when you’re done painting.
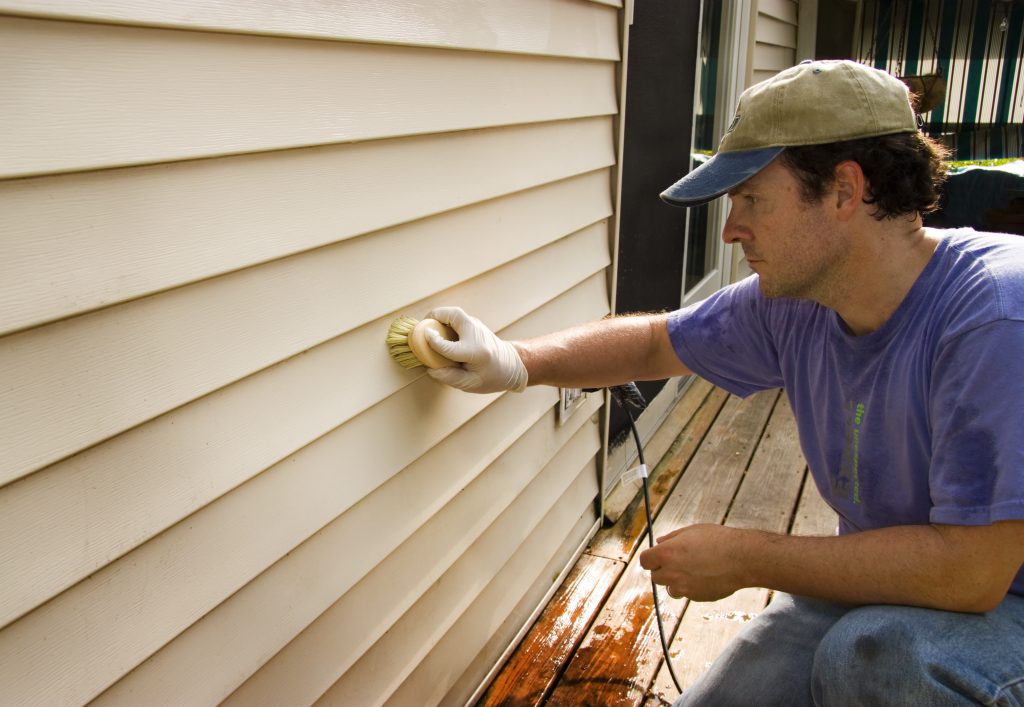
Step 1: Washing
You don’t want to simply paint over the years of gunk that have accumulated on your home. All of the dirt and grime that’s accumulated on your home’s exterior will keep the paint from adhering well.
A pressure washer can make the job go quickly, but be careful not to groove your siding or damage your windows. You could use a hose, a pump sprayer, or a stiff bristle brush if a power sprayer seems like an opportunity to increase your repair costs.
Don’t forget to protect the landscaping close to your home before you start cleaning. Plastic dropcloths can cook the plants they’re protecting, so opt for fabric.
Wet the walls, then wash them with diluted (1:16) bleach solution with the same amount of phosphate-free cleaner as bleach. A cup of bleach and cleaner to a gallon of water works out to be the right amount.
Work in sections, and work from the top down to avoid leaving streaks of dirt. When you’re done with a section, don’t forget to rinse it off. After a day or two of dry weather, you should be ready to paint.
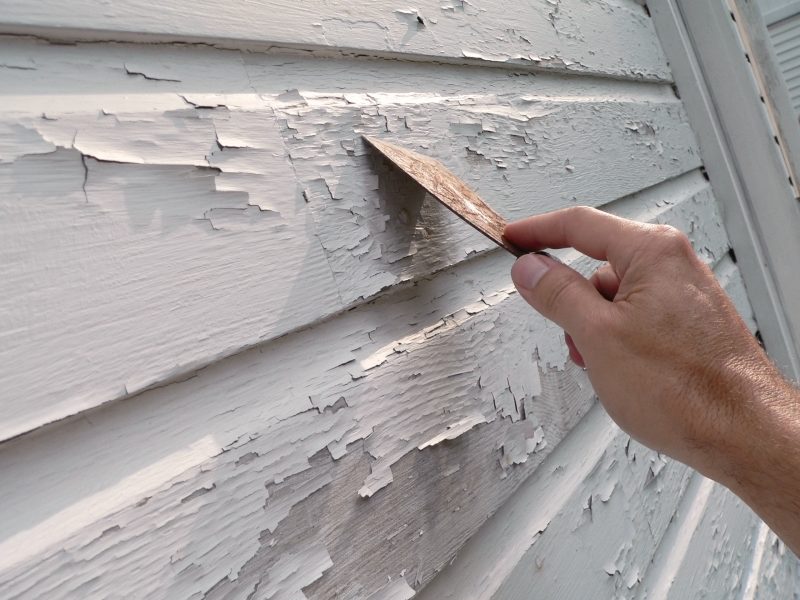
Step 2: Scraping
If your paint is cracked, peeled, bubbled, or blistered, it needs to go. If your home was built before 1978 you need to proceed with care because there may be lead paint present. If you’re not sure, there are a variety of at home test kits that you can use, or you can send a sample of your paint off to a lab for lead testing.
Even if you’re sure that you don’t have lead paint on your home, you’ll want to use a respirator when scraping paint. As long as the edges of your existing paint aren’t peeling up you can probably leave that section alone. The new coat of paint will seal the edges and help to keep them in place. If you find yourself removing all of the paint from your home, it’s time to look into hiring painters who will be able to finish the prep work and paint much faster than you would.
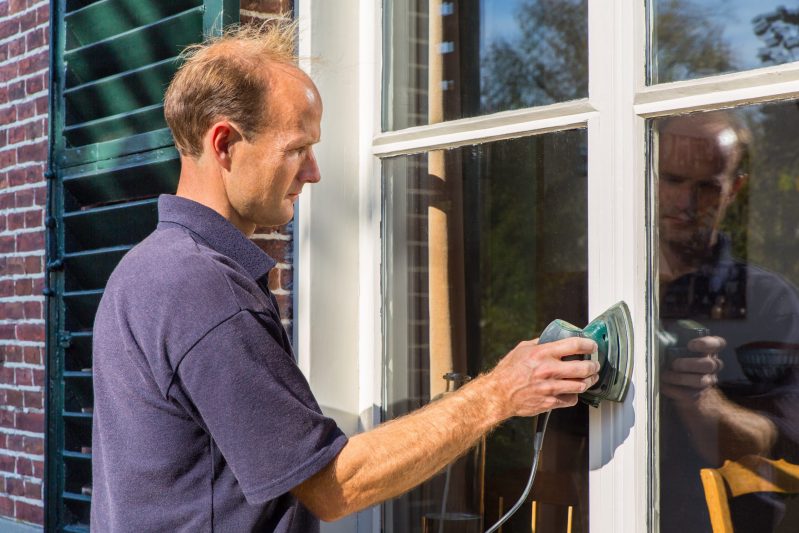
Step 3: Sanding
Now that the loose paint has been removed, you can get a better look at the paint that’s left. If the remaining paint adheres well and isn’t in too bad shape, you can smooth the transition from paint to bare surface with some sandpaper. Something around 80-grit should be fine. For areas that might get a bit more attention like problem areas on the first floor around doors, you may want to follow up with a lighter grit sandpaper to smooth out any scratches that a new coat of paint would magnify.
For sanding by hand, a dust mask will be sufficient to protect yourself, but if you have a large area that you need to sand and you’re using an orbital sander you’ll want to use a respirator for extra protection. Don’t be the guy in this picture.
Step 4: Patch and Fill
With the sanding done, now is the time to fill minor cracks in your siding, repair any pieces, or replace pieces that may be too damaged to repair. If you’re not quite sure what to use to fill cracks. Our paint experts will be glad to help you find the right product!
Step 5: Prime
After all of the sanding and scraping, you’ve exposed parts of the siding, and priming the surface before painting protects the surface and gives your paint a surface to bond to. Acrylic primers can be used on almost every surface, but if you’re painting cedar or redwood surfaces you’ll want to use an oil-based primer that will lock in the red color of the wood so it doesn’t leach out and leave stains.
Ask the paint counter to tint your primer a contrasting color to your top coat so you can easily see if you need to apply more paint to an area.
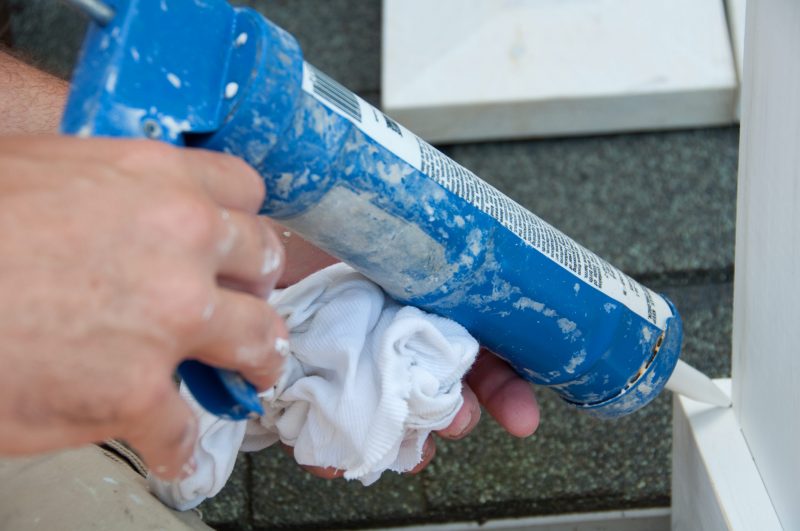
Step 6: Caulk
While you’re waiting for your primer to dry, now is a good time to caulk all of the small joints in the siding and trim. You’ll only want to do this for joints or gaps that are less than ¼”. A urethane acrylic is more expensive, but will last longer and endure temperature changes better. Siliconized acrylic caulk is another option that’s less expensive, but generally won’t last as long as a urethane acrylic caulk.
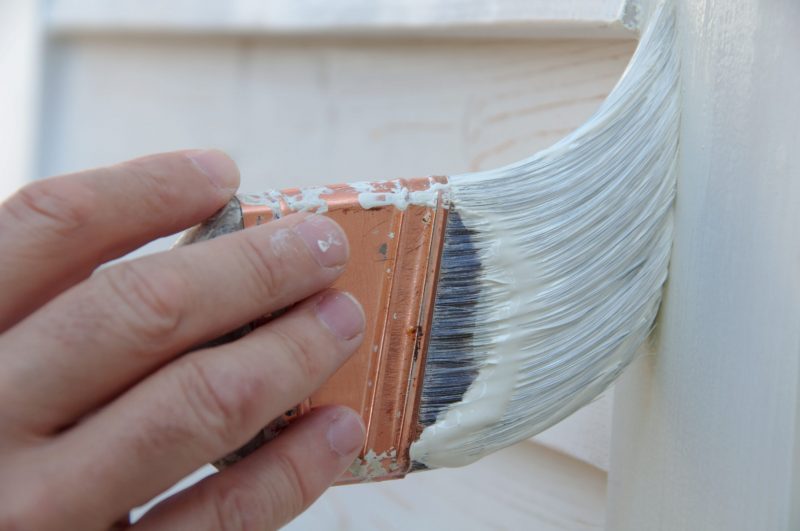
Step 7: Paint
Finally! But all of that prep work will make the finished job look so much better! Now you get to decide how to apply the paint. The old reliable paint brush will work, but it may take days to paint your whole home. The upside to using a brush is that you know you’ve looked at every inch of your home.
A lot of professionals use sprayers to save time, but they can take getting used to for first timers. If you’ve never used one you might leave drips, coats of paint that are too thin, and overspray on things other than your siding.
The best place to start is at the highest point in your project and work down. That way, any drips, splatters, or overspray can be addressed as you work. Working in the shade and out of the sun gives you more time to work with your paint and avoid brush lines or uneven paint.
Keep an eye on the weather, too. Rain can wash freshly applied latex paint right off of your home and temperatures below 50 degrees Fahrenheit can interfere with the paint adhering and can cause paint to cure to a dull finish even with a glossy paint.

One last tip
It sounds like extra work and a ruse to sell more paint, but one of the secrets to a long-lasting paint job is applying two coats to your home. Remember all of that prep work that you did? You won’t have to do it nearly as often when you apply a second coat of paint.
And our paint experts are always ready to lend a hand with your project and have years of experience to share with you to make sure your project is a success whether you’re painting your home’s exterior or interior!